> Quick answer: A narrow beam angle (5°–10°) concentrates lumens into a smaller area, producing significantly higher lux on the ground compared to a wide beam (48°–60°) with the same lumen rating [2]. For example, a 10° spotlight can deliver five to thirty times greater intensity than a floodlight [1]. Mounting height must align with beam angle to avoid glare and ensure coverage—ideally, no more than 35° from vertical to prevent discomfort [4].
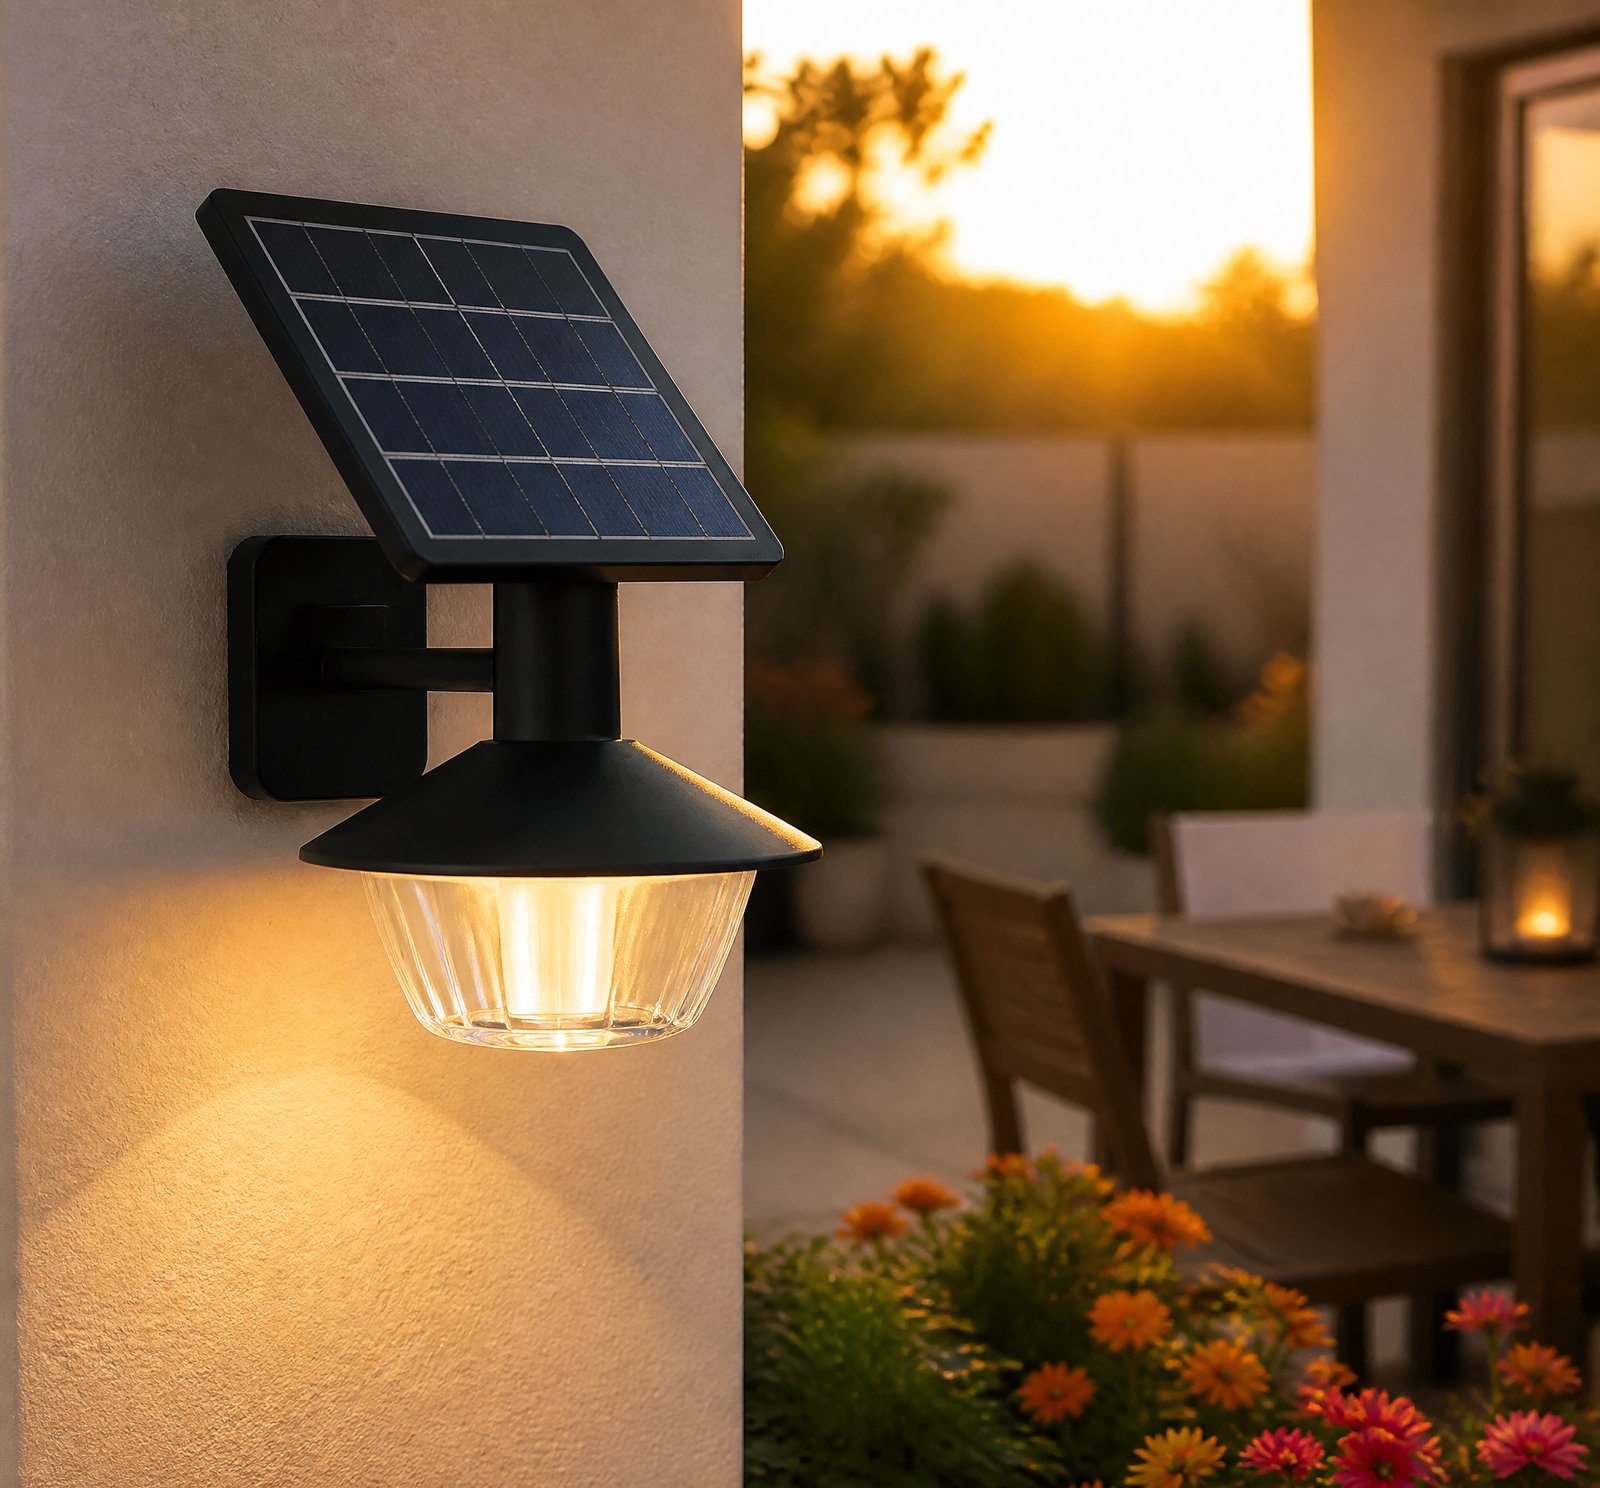
Solar lighting is transforming outdoor illumination across Romania, offering sustainable, off-grid solutions for streets, gardens, and rural homes. But choosing the right solar lamp isn’t just about battery life or brightness—it’s about beam angle. The way light spreads from a fixture directly impacts how much usable lux reaches the ground, and whether it’s safe and effective for its intended purpose.
How Beam Angle Determines Usable Lux on the Ground
Beam angle defines how widely light spreads from a fixture [1]. A spotlight with a narrow beam (5°–10°) focuses all its lumens into a small, intense area, resulting in high lux levels—ideal for accenting a door, path, or artwork [3][8]. In contrast, a wide-beam floodlight (48°–60°) spreads the same lumen output over a larger surface, reducing lux but increasing coverage [3][8]. This trade-off means that for the same lumen rating, a narrow beam can produce five to thirty times greater intensity than a wide one [1].
Lux—measured in lumens per square meter—depends on both lumen output and beam spread [2]. A narrow beam concentrates light, boosting brightness on a small zone; a wide beam diffuses it, lowering brightness but covering more area. This is critical when designing solar lamps for specific uses in Romanian homes, parks, or pathways.
| Beam Type | Beam Angle | Lux Output (Relative) | Best Use Case |
|–––-|––––|––––––––|–––––-|
| Spotlight | 5°–10° | High (up to 30× more than wide) [1] | Accent lighting, pathways |
| Floodlight | 48°–60° | Lower, spread over wider area [3][8] | General area lighting, patios |
Matching Beam Angle to Mounting Height
Mounting height significantly affects how beam angle performs on the ground. A 10° beam at 3 meters covers a diameter of roughly 0.5 meters—perfect for illuminating a small display table without spilling light onto nearby floors [3]. But if the same lamp is mounted too high or aimed too steeply, the beam may miss the target entirely, reducing effectiveness.
Glare control is a key safety concern. To avoid discomfort and reduced visibility, downward angles should not exceed 35° from vertical [4]. Exceeding this can cause light to reflect off surfaces at low angles, creating glare that impacts pedestrians and drivers. This is especially important in urban and residential areas across Romania where nighttime visibility matters for safety.
Additionally, improper mounting can contribute to skyglow—light pollution from upward-emitted light [12]. Shallow-bowl or flat-glass luminaires that aren’t angled properly can scatter light into the sky, worsening light pollution. Proper mounting angles help direct light downward, minimizing environmental impact [12].
Practical Design Considerations in Romania
Romanian homes and villages often feature narrow alleys, uneven terrain, and seasonal lighting needs. The right solar lamp must balance beam angle, height, and purpose:
- Accent lighting (e.g., garden features, architectural details) benefits from narrow beams (5°–10°) and precise aiming [3].
- General area lighting (e.g., courtyards, driveways) works best with wider beams (48°–60°) to cover larger zones [8].
- Maintenance access matters: open luminaires with screw-based reflectors are easier to service in hard-to-reach spots [16].
- Energy efficiency and regulations require attention—solar lamps should comply with local light pollution and safety standards [12][13].
Key Takeaways
Key Takeaways
- Narrow beam angles (5°–10°) deliver up to 30× more lux than wide beams with the same lumen output [1].
- Mounting height must align with beam angle to ensure coverage and avoid glare [4].
- Avoid downward angles beyond 35° to prevent visual discomfort and accidents [4].
- Wide beams (48°–60°) are ideal for general lighting, while narrow beams suit focused tasks [3][8].
- Proper mounting reduces skyglow and supports environmental compliance [12].
References
- [1] Lighting for Film and Television — book
source passage
On location, metal halide (HMI, CSI, CID) or carbon arcs are also used. The lamp is fixed at the focus of a spherical metal mirror, the resulting parallel light rays passing through a plano-convex, fresnel, or stepped-lens system. The reflector/lamp assembly is moved along support bars by turning a screw knob, hand-crank or sweep lever. As the lamp travels towards the lens, the spot’s light beam spreads (‘floods’) up to an arc of perhaps 60°. Moving it back from the lens, the beam narrows, and concentrates to a minimum coverage of e.g. 10° (‘full spot’). The intensity of the light beam alters as the fixture is focused, and may be anything from five to thirty times as great when fully spotted as when fully flooded (depending on the design and power of the fixture). So one method of adjusting the intensity of a fresnel spotlight is to floor or spot it a little, rather than use a diffuser or a dimmer. (And, of course, its color temperature remains constant.) The disadvantage of this technique is that the lamp’s coverage changes at the same time as the light level! Most fresnel spotlights are designed so that the edge of the light beam is diffused, and falls off in brightness. This ‘soft edge’ enables you to slightly overlap the beams from adjacent lamps so that they merge and blend to maintain even illumination over a large area. Mounted in a stirrup or yoke, the lamp head can be turned, and tilted up and down over a wide angle. However, do not be tempted to tilt the housing too
- [2] candlepowerforumscomthreadseasy-to-understand-lumens-vs-lux__e7e2b9c0 — reddit
source passage
bright!". They both put out exactly the same amount of water/lumens though. Lux is the lumens per square meter on the target….so, the more lumens you have, the easier to spread them out and still have enough lux to see targets. If your beam spot is 10 square meters in size, you'd need ten times more lumens to have it look as bright as if it were focused down to only 1 square meter in size. IE: For the same "brightness", you'd need 1,000 lumens to get your 10 square meters to look as bright as the 1 square meter would look with only 100 lumens. This is why a guy with a 100 lumen light with a tight beam might say "its impossible to read with it because there's too much glare", but a guy with a 500 lumen floody beam can read the same page with no glare. 😀 Last edited:
- [3] Architectural Lighting_ A Practical Guide — book
source passage
know what luminaire type he or she will be specifying but wants to know where and how many luminaires should be placed. Depending on the effect one is looking to achieve the beam angle will vary. For example, perhaps one is trying to cover a narrow display table with light. An elevation with the table width and length, including the room height, is required. One then checks the available beam angle of various lighting suppliers and draws the selected beam angles on the elevation. The beam angle lines touching the surface define the diameter of the luminaire. That diameter can then be drawn and is placed onto the plan view. In this case, the ten-degree beam angle drawn in orange is the right beam angle for a down-light or spotlight placed above the display table. This way we can make sure that light really hits the table only, creating a focus onto the table and not spilling light onto the floor. Figure 5.12 Top view – showing the light on the table. BEAM-SPOT DEFINITION AND QUANTITY FOR A SPACE A similar approach can be used to establish luminaire angle and quantity for an entire room. Let’s say it is only possible to use lights in the middle of a room because the rest of the ceiling has to be kept clean. The same method of working on the section first, then the plan view, must be applied. The section of the space is drawn and the light beam is angled to cover the space. The former round-beam spot becomes an oval and covers more surface in one direction. This method allows on
- [4] IESNA Lighting Handbook_ IESNA 9th Edition — book
source passage
grade-mounted luminaires. Wiring for downlights must be shielded from mechanical damage from the ground to 2.5 m (8 ft) above grade. Never aim downlights at an angle greater than 35° from vertical, or glare is likely to be a problem.10 Take advantage of the variety of shields offered by many manufacturers to control glare. Always use a mounting device that accommodates the growth of the tree. Plan and coordinate a maintenance and pruning schedule with the landscape architect or the landscape maintenance contractor.10 Design Guidelines for Water Features Light interacts with water in three different ways: refraction, reflection, and dispersion (Figure 21-16). Light is refracted (changes direction) when passing from air into water or vice versa. This is why the apparent location of a submerged object can shift. Refraction also causes rainbows or sparkle in water droplets or in turbulent water. Figure 21-16. Underwater rays can be refracted or reflected depending on the incident angle with which they strike the surface of the water. Dispersion (not shown) also occurs whenever a light ray strikes a particle or air bubble in the water. In addition to refraction, reflection also occurs when light strikes the water's surface; light is redirected back into the air or into the water in which it had been traveling. As with a mirror, the angle of incidence equals the angle of reflection. This is an important consideration for determining equipment location because it is possible to see
- [8] Architectural Lighting_ A Practical Guide — book
source passage
than the light of diffused fluorescent tubes. Their reflectors can create a light beam that is defined by its beam angle. The beam angle generally ranges from a narrow five-degree to the so-called flood sixty-degree beam angle. A tight beam angle not only focuses the actual light beam but also allows it to ‘transport’ the light further than a wide beam angle with the same light source. A tight beam angle creates an intense light spot suitable for accentuating an object while wide beam angles are more suited to covering surfaces and general areas. Beside the various beam angles, one has the choice of asymmetric reflectors. They are usually designed to throw light at an angle covering the perpendicular surface. Figure 2.15 Interchangeable reflector. (Reggiani) Figure 2.16 Tight and intense 8-degree beam spot to a softer 48-degree flood spot. (iGuzzini) Figure 2.17 Bespoke LED tube using recessed light from the shelf lenses. (Mindseye Lighting) Lenses Lenses were used long before the introduction of LED lamps. But they are a new factor to be considered within luminaires since the progress of LED. The cold LED light source has allowed cheap and easy-to-manufacture plastic lenses to develop. Just like reflectors, they deform the beam shape of the light emitted by the LED. Most LED strips and 1w or 3w LEDs emit light in a 120-degree beam. LED lenses are attached directly to the LED and generate either a tighter or a wider beam angle. There are many LED lens manufacturers offering a
- [12] Light Pollution_ Responses and Remedies — book
source passage
between adjacent louvres. The beams then spread out from the surface of last reflection. The efficiency of such louvred lamps varies, but they are certainly an improvement on types with no director at all. All glass surfaces intro- duce an internal reflection of about 10% of the light, which then exits in some other direction. Of course, capping globes with light-proof hemispheres will prevent much upward light, and many manufacturers produce accessories allowing lamps to be "retro- fitted", i.e. altered in design after installation. Some capped cylindrical and globe lights also use arrays of small prisms to refract otherwise upward components downwards. Again there is the multiple reflection problem, and the scatter from the prismatic screens, if optically very imperfect, is significant, still giving sideways and upward waste light. On more typical road lamps, the design of bowls slung beneath the light source is important: the more curved the glass bowl, the more widespread the beam will be. Some "full-cut-off' lamps have deep bowls, and these produce a secondary image of the light source which is well below the level of the cut-off and can be seen at a range of angles. 80 Mounting angles are also important in cutting down skyglow. Some shallow-bowl or flat-glass luminaires, which would normally emit little or no light above the horizontal, can cause skyglow and glare if they have been mounted with the glass at an angle well above the horizontal. If your local lighting prov
- [13] The_case_for_solar-powered_LED_lighting_Buildings__1496c42d — authority
source passage
lighting (assuming that the lighting design incorporates multiple LED installations to compensate for shadows in a space measuring 4 feet square). The relatively low lumen output ratings of LED lamps are often times compensated for when looking at the foot-candle levels at the illuminated surfaces. In other words, for outdoor lighting applications, SolarOne estimates that an LED lamp rated at 45 lumens per watt will perform equivalently to a fluorescent bulb rated at 75 lumens per watt. This facet of LEDs offer an enormous side benefit to areas with dark-sky mandates. 2. Optimized system efficiency Solar cells and LEDs share many characteristics – even in the assembly process. For example, both solar cells and LEDs require sorting and balancing to optimize performance. The SOLED mc2 LED Lamp and Lamp Driver is configured to effectively eliminate the need for balancing resistors and their associated losses. Perhaps more significantly, through its range of testing and field experience, SolarOne has identified "sweet spots" in LED operation that optimize current flows and light levels with solar panel and battery costs. The trade-offs are quite different than grid-connected or even automotive applications. This translates into almost a 10% improvement in overall system efficiency. 3. Fine tuned to user needs
- [16] IESNA Lighting Handbook_ IESNA 9th Edition — book
source passage
through floor openings and interesting opportunities for highlighting trees, landscaping, and other architectural elements that can be appreciated from several viewpoints. However, the variety of possible views looking up from the main floor and down from the elevated walkways dictates that the designer pay close attention to the shielding characteristics of the selected luminaires. Where maintenance accessibility is difficult, open luminaires with screw-based reflector lamps have traditionally been used to satisfy some of these opportunities for accent lighting, as well as the associated requirements for beam control and shielding. Although traditionally the domain of line-voltage incandescent and tungsten halogen sources, metal halide lamps are also now available in screw-based reflector versions. In situations where maintenance can be more easily accommodated through top access, mechanical lifts, or clever positioning, low-voltage incandescent and tungsten halogen sources are frequently considered for long throws that require narrow beam distributions. However, luminaires with optical systems designed for compact metal halide and color-improved high-pressure sodium lamps can also meet these performance requirements often with the benefits of longer lamp life and lower energy use (see Chapter 6, Light Sources). Presence of Skylights and Other Daylighted Elements. When skylights are present in a single or multilevel mall concourse, it is necessary to evaluate how much the da
On location, metal halide (HMI, CSI, CID) or carbon arcs are also used. The lamp is fixed at the focus of a spherical metal mirror, the resulting parallel light rays passing through a plano-convex, fresnel, or stepped-lens system. The reflector/lamp assembly is moved along support bars by turning a screw knob, hand-crank or sweep lever. As the lamp travels towards the lens, the spot’s light beam spreads (‘floods’) up to an arc of perhaps 60°. Moving it back from the lens, the beam narrows, and concentrates to a minimum coverage of e.g. 10° (‘full spot’). The intensity of the light beam alters as the fixture is focused, and may be anything from five to thirty times as great when fully spotted as when fully flooded (depending on the design and power of the fixture). So one method of adjusting the intensity of a fresnel spotlight is to floor or spot it a little, rather than use a diffuser or a dimmer. (And, of course, its color temperature remains constant.) The disadvantage of this technique is that the lamp’s coverage changes at the same time as the light level! Most fresnel spotlights are designed so that the edge of the light beam is diffused, and falls off in brightness. This ‘soft edge’ enables you to slightly overlap the beams from adjacent lamps so that they merge and blend to maintain even illumination over a large area. Mounted in a stirrup or yoke, the lamp head can be turned, and tilted up and down over a wide angle. However, do not be tempted to tilt the housing too
bright!". They both put out exactly the same amount of water/lumens though. Lux is the lumens per square meter on the target….so, the more lumens you have, the easier to spread them out and still have enough lux to see targets. If your beam spot is 10 square meters in size, you'd need ten times more lumens to have it look as bright as if it were focused down to only 1 square meter in size. IE: For the same "brightness", you'd need 1,000 lumens to get your 10 square meters to look as bright as the 1 square meter would look with only 100 lumens. This is why a guy with a 100 lumen light with a tight beam might say "its impossible to read with it because there's too much glare", but a guy with a 500 lumen floody beam can read the same page with no glare. 😀 Last edited:
know what luminaire type he or she will be specifying but wants to know where and how many luminaires should be placed. Depending on the effect one is looking to achieve the beam angle will vary. For example, perhaps one is trying to cover a narrow display table with light. An elevation with the table width and length, including the room height, is required. One then checks the available beam angle of various lighting suppliers and draws the selected beam angles on the elevation. The beam angle lines touching the surface define the diameter of the luminaire. That diameter can then be drawn and is placed onto the plan view. In this case, the ten-degree beam angle drawn in orange is the right beam angle for a down-light or spotlight placed above the display table. This way we can make sure that light really hits the table only, creating a focus onto the table and not spilling light onto the floor. Figure 5.12 Top view – showing the light on the table. BEAM-SPOT DEFINITION AND QUANTITY FOR A SPACE A similar approach can be used to establish luminaire angle and quantity for an entire room. Let’s say it is only possible to use lights in the middle of a room because the rest of the ceiling has to be kept clean. The same method of working on the section first, then the plan view, must be applied. The section of the space is drawn and the light beam is angled to cover the space. The former round-beam spot becomes an oval and covers more surface in one direction. This method allows on
grade-mounted luminaires. Wiring for downlights must be shielded from mechanical damage from the ground to 2.5 m (8 ft) above grade. Never aim downlights at an angle greater than 35° from vertical, or glare is likely to be a problem.10 Take advantage of the variety of shields offered by many manufacturers to control glare. Always use a mounting device that accommodates the growth of the tree. Plan and coordinate a maintenance and pruning schedule with the landscape architect or the landscape maintenance contractor.10 Design Guidelines for Water Features Light interacts with water in three different ways: refraction, reflection, and dispersion (Figure 21-16). Light is refracted (changes direction) when passing from air into water or vice versa. This is why the apparent location of a submerged object can shift. Refraction also causes rainbows or sparkle in water droplets or in turbulent water. Figure 21-16. Underwater rays can be refracted or reflected depending on the incident angle with which they strike the surface of the water. Dispersion (not shown) also occurs whenever a light ray strikes a particle or air bubble in the water. In addition to refraction, reflection also occurs when light strikes the water's surface; light is redirected back into the air or into the water in which it had been traveling. As with a mirror, the angle of incidence equals the angle of reflection. This is an important consideration for determining equipment location because it is possible to see
than the light of diffused fluorescent tubes. Their reflectors can create a light beam that is defined by its beam angle. The beam angle generally ranges from a narrow five-degree to the so-called flood sixty-degree beam angle. A tight beam angle not only focuses the actual light beam but also allows it to ‘transport’ the light further than a wide beam angle with the same light source. A tight beam angle creates an intense light spot suitable for accentuating an object while wide beam angles are more suited to covering surfaces and general areas. Beside the various beam angles, one has the choice of asymmetric reflectors. They are usually designed to throw light at an angle covering the perpendicular surface. Figure 2.15 Interchangeable reflector. (Reggiani) Figure 2.16 Tight and intense 8-degree beam spot to a softer 48-degree flood spot. (iGuzzini) Figure 2.17 Bespoke LED tube using recessed light from the shelf lenses. (Mindseye Lighting) Lenses Lenses were used long before the introduction of LED lamps. But they are a new factor to be considered within luminaires since the progress of LED. The cold LED light source has allowed cheap and easy-to-manufacture plastic lenses to develop. Just like reflectors, they deform the beam shape of the light emitted by the LED. Most LED strips and 1w or 3w LEDs emit light in a 120-degree beam. LED lenses are attached directly to the LED and generate either a tighter or a wider beam angle. There are many LED lens manufacturers offering a
between adjacent louvres. The beams then spread out from the surface of last reflection. The efficiency of such louvred lamps varies, but they are certainly an improvement on types with no director at all. All glass surfaces intro- duce an internal reflection of about 10% of the light, which then exits in some other direction. Of course, capping globes with light-proof hemispheres will prevent much upward light, and many manufacturers produce accessories allowing lamps to be "retro- fitted", i.e. altered in design after installation. Some capped cylindrical and globe lights also use arrays of small prisms to refract otherwise upward components downwards. Again there is the multiple reflection problem, and the scatter from the prismatic screens, if optically very imperfect, is significant, still giving sideways and upward waste light. On more typical road lamps, the design of bowls slung beneath the light source is important: the more curved the glass bowl, the more widespread the beam will be. Some "full-cut-off' lamps have deep bowls, and these produce a secondary image of the light source which is well below the level of the cut-off and can be seen at a range of angles. 80 Mounting angles are also important in cutting down skyglow. Some shallow-bowl or flat-glass luminaires, which would normally emit little or no light above the horizontal, can cause skyglow and glare if they have been mounted with the glass at an angle well above the horizontal. If your local lighting prov
lighting (assuming that the lighting design incorporates multiple LED installations to compensate for shadows in a space measuring 4 feet square). The relatively low lumen output ratings of LED lamps are often times compensated for when looking at the foot-candle levels at the illuminated surfaces. In other words, for outdoor lighting applications, SolarOne estimates that an LED lamp rated at 45 lumens per watt will perform equivalently to a fluorescent bulb rated at 75 lumens per watt. This facet of LEDs offer an enormous side benefit to areas with dark-sky mandates. 2. Optimized system efficiency Solar cells and LEDs share many characteristics – even in the assembly process. For example, both solar cells and LEDs require sorting and balancing to optimize performance. The SOLED mc2 LED Lamp and Lamp Driver is configured to effectively eliminate the need for balancing resistors and their associated losses. Perhaps more significantly, through its range of testing and field experience, SolarOne has identified "sweet spots" in LED operation that optimize current flows and light levels with solar panel and battery costs. The trade-offs are quite different than grid-connected or even automotive applications. This translates into almost a 10% improvement in overall system efficiency. 3. Fine tuned to user needs
through floor openings and interesting opportunities for highlighting trees, landscaping, and other architectural elements that can be appreciated from several viewpoints. However, the variety of possible views looking up from the main floor and down from the elevated walkways dictates that the designer pay close attention to the shielding characteristics of the selected luminaires. Where maintenance accessibility is difficult, open luminaires with screw-based reflector lamps have traditionally been used to satisfy some of these opportunities for accent lighting, as well as the associated requirements for beam control and shielding. Although traditionally the domain of line-voltage incandescent and tungsten halogen sources, metal halide lamps are also now available in screw-based reflector versions. In situations where maintenance can be more easily accommodated through top access, mechanical lifts, or clever positioning, low-voltage incandescent and tungsten halogen sources are frequently considered for long throws that require narrow beam distributions. However, luminaires with optical systems designed for compact metal halide and color-improved high-pressure sodium lamps can also meet these performance requirements often with the benefits of longer lamp life and lower energy use (see Chapter 6, Light Sources). Presence of Skylights and Other Daylighted Elements. When skylights are present in a single or multilevel mall concourse, it is necessary to evaluate how much the da